| Eclipse+tomcat+axis2进行web service部署 | 您所在的位置:网站首页 › eclipse web service › Eclipse+tomcat+axis2进行web service部署 |
Eclipse+tomcat+axis2进行web service部署
|
用Eclipse+axis2+tomcat进行web service部署
2016-12-07 目录 1 安装JDK 1.1 下载JDK 1.2 安装和配置JDK 1.3 验证2 安装Eclipse 2.1 下载Eclipse 2.2 安装3 安装Tomcat 3.1 下载Tomcat 3.2 安装及配置 3.3 验证4 安装axis2 4.1 下载axis2 4.2 在tomcat中部署axis2 4.3 在eclipse中配置axis25 建立要发布的Web Service6 发布Web Service7 编写客户端代码调用WebService 参考 1 安装JDK返回 1.1 下载JDKJDK下载地址:http://www.oracle.com/technetwork/java/javase/downloads/jdk8-downloads-2133151.html 1.2 安装和配置JDK 安装目录尽量不要有空格 D:\Java\jdk1.8.0_91; D:\Java\jre8 设置环境变量: “我的电脑”->右键->“属性”->”高级系统设置”->"新建系统变量" JAVA_HOME:D:\Java\jdk1.8.0_91 Path: %JAVA_HOME%\bin 重启计算机 1.3 验证验证一下是否搭建成功 打开CMD,输入: java -version
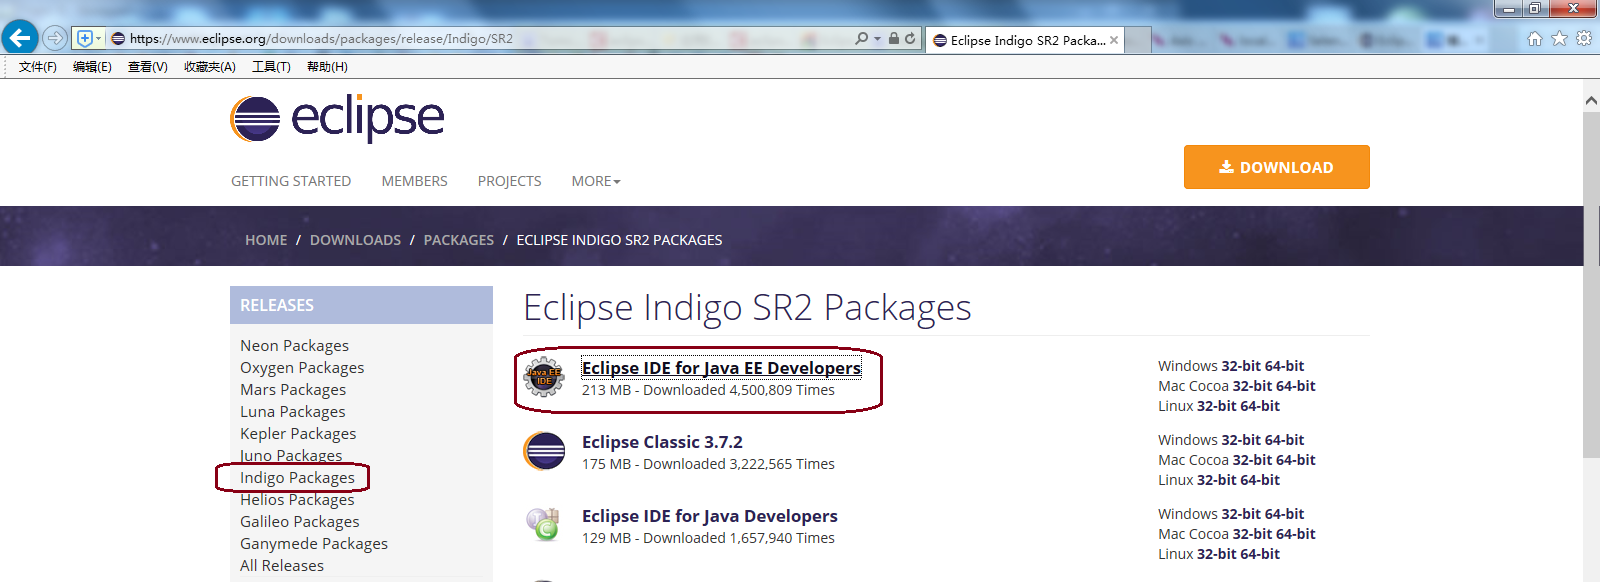
返回 2.1 下载Eclipse下载地址: https://www.eclipse.org/downloads/packages/release/Indigo/SR2,下载“Eclipse IDE for Java EE Developers”
解压即可使用。这里解压到 D:\Program Files\eclipse-jee-indigo-SR2-win32-x86_64\ 3 安装Tomcat返回 3.1 下载Tomcat下载地址: http://tomcat.apache.org/download-70.cgi
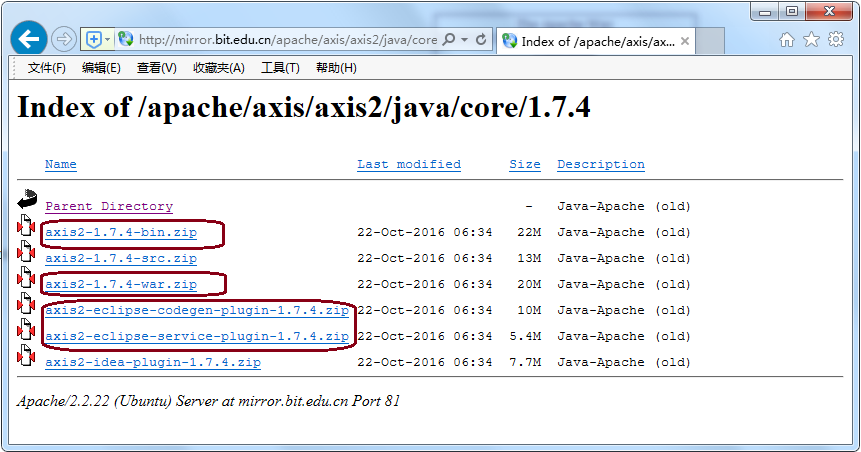
以“管理员身份运行” D:\tomcat\bin\startup.bat http://localhost:8080/ 4 安装axis2返回 4.1 下载axis2axis主页面:http://ws.apache.org/axis2/download.cgi 下载地址:http://mirror.bit.edu.cn/apache/axis/axis2/java/core/1.7.4/
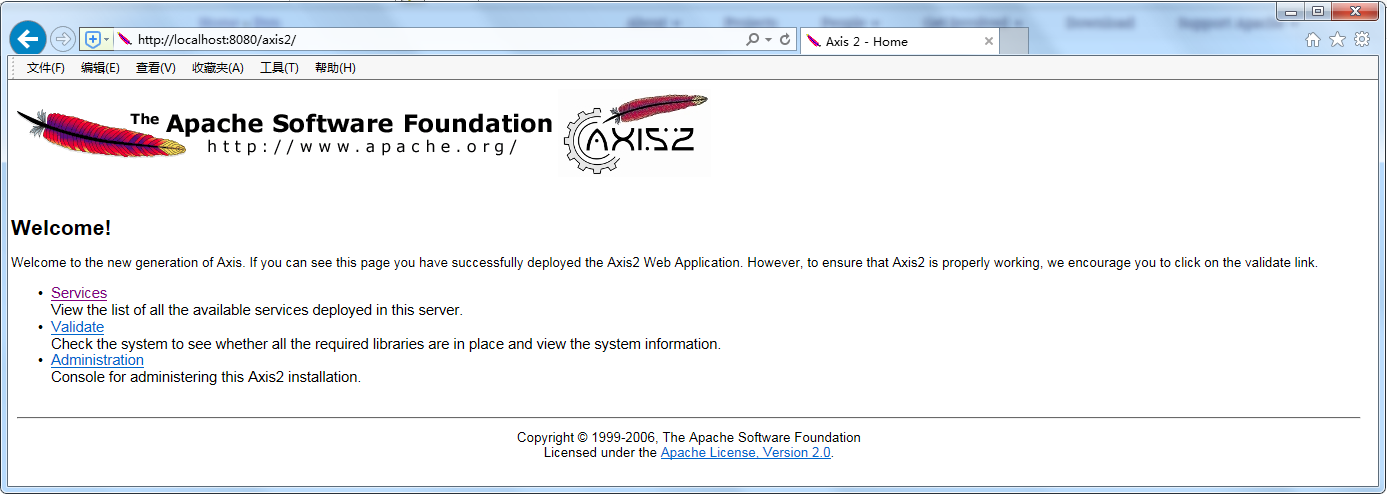
下载axis2-1.7.4-bin.zip,解压到:D:\Dev\axis2-1.7.4 ,lib目录下的jar包是WebService业务开发需要的库文件 4.2 在tomcat中部署axis2下载axis2-1.6.2-war.zip,解压到tomcat的webapps目录下(D:\tomcat\webapps),重启tomcat,会发现webapps目录下多了axis2文件夹,在浏览器里输入http://localhost:8080/axis2,会发现对应的网页,说明已经成功了
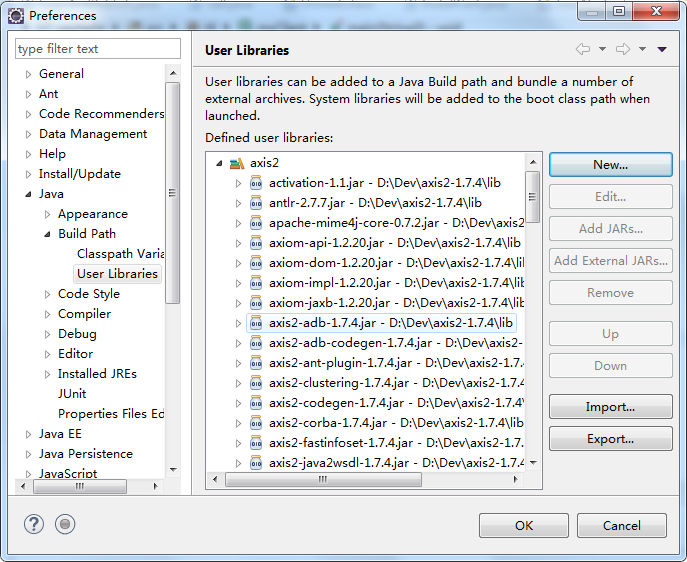
返回 打开Eclipse,Windows->Preferences下new一个User Libraries,命名为axis2,将下载axis2-1.7.4-bin.zip解压到:D:\Dev\axis2-1.7.4,把该目录下lib 下的包均添加进来,如下图所示。这一步操作的目的是为了以后工程方便添加axis2所需的 jar文件。
返回 1. 编译刚刚建立的Hello类,类编译后,会在workspace中对应工程目录下的bin文件夹下生成Hello.class文件 2. 打包要发布的Service, 点击Eclipse中New -> File -> Other -> Axis2 wizards -> Axis2 Services Archiver
3. 按上图填写,class File Location为工作目录对应项目的bin文件夹,并勾上Include .class files only,点击next 4. 默认选择Skip WSDL,点击next 5. 默认,继续next 6. 默认,继续next
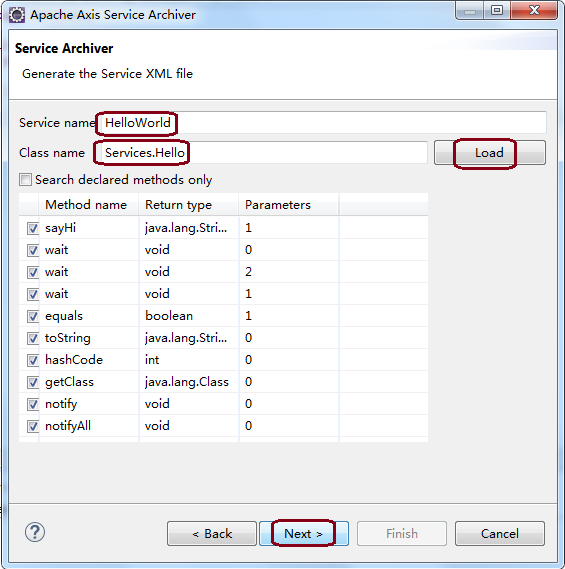
7. 如上图所示,Class name请务必设为Services.Hello,代表使用的类是D:\Users\...\workspace\HelloWorld\bin路径下,文件夹Services下的Hello类,否则Load不上的。
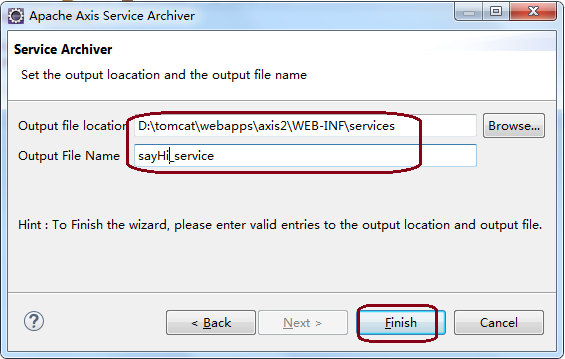
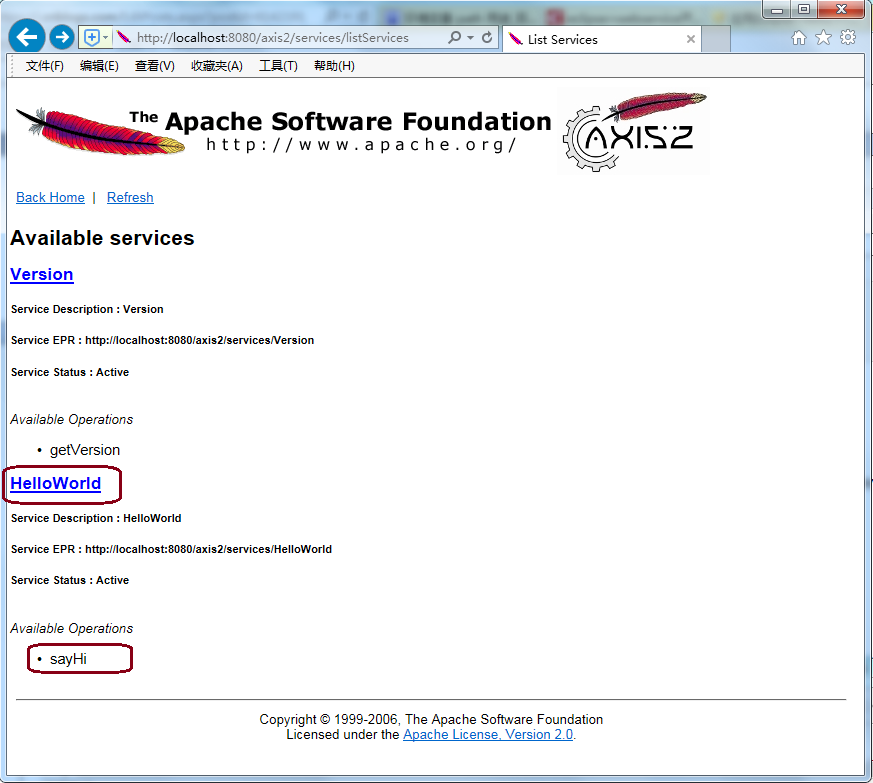
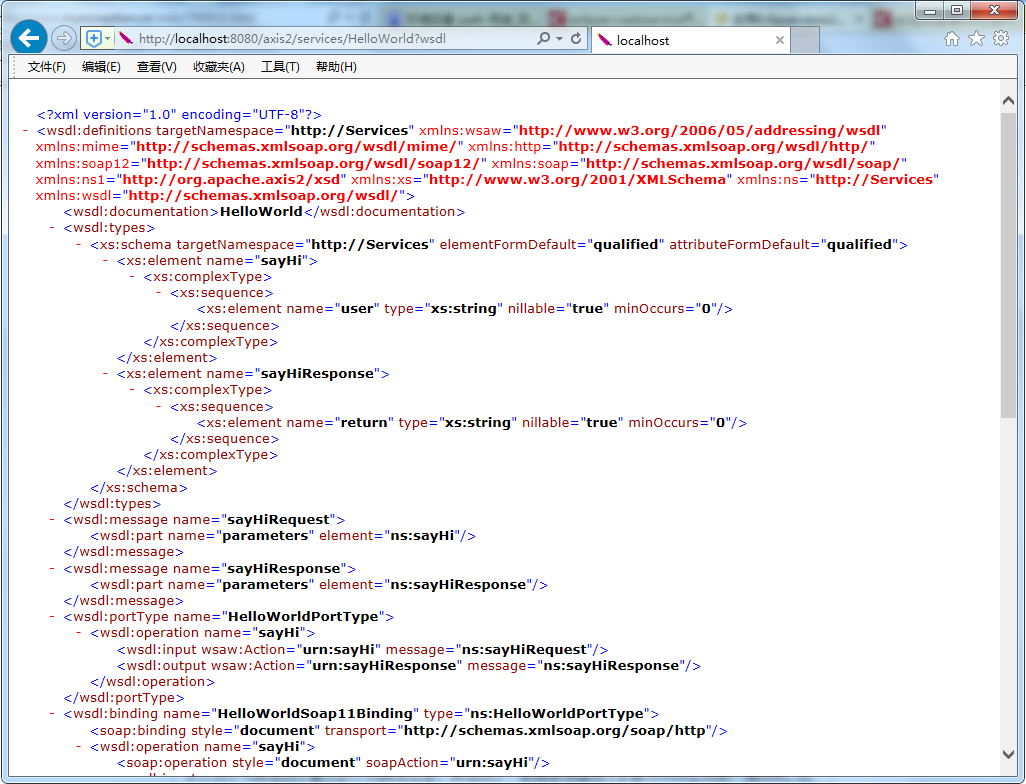
8. 如上图所示,output file location务必填写tomcat目录的axis2\web-inf\services下,点击Finish后,可以发现:D:\tomcat\webapps\axis2\WEB-INF\services目录下增加了sayHi_service.aar 9. 测试所发布的Web Service 打开http://localhost:8080/axis2/services/listServices页面,可以看到HelloWorld服务: 点击HelloWorld链接进入wsdl页面
返回 在src包中建包Client,建立myClient类如下: package Client; import javax.xml.namespace.QName; import org.apache.axis2.AxisFault; import org.apache.axis2.addressing.EndpointReference; import org.apache.axis2.client.Options; import org.apache.axis2.rpc.client.RPCServiceClient; public class myClient { public static void main(String[] args) throws AxisFault { // 使用RPC方式调用WebService RPCServiceClient serviceClient = new RPCServiceClient(); Options options = serviceClient.getOptions(); // 指定调用WebService的URL EndpointReference targetEPR = new EndpointReference("http://localhost:8080/axis2/services/HelloWorld"); options.setTo(targetEPR); // 指定要调用的sayHelloToPerson方法及WSDL文件的命名空间 QName opAddEntry = new QName("http://Services", "sayHi"); // 指定sayHelloToPerson方法的参数值 Object[] opAddEntryArgs = new Object[] { "John" }; // 指定sayHelloToPerson方法返回值的数据类型的Class对象 Class[] classes = new Class[] { String.class }; // 调用sayHelloToPerson方法并输出该方法的返回值 System.out.println(serviceClient.invokeBlocking(opAddEntry, opAddEntryArgs, classes)[0]); } }运行该程序,点击Run As->Java application,可以看到控制台端口的输出是:Hi, John 参考[1] Eclipse+axis2+tomcat进行web部署 [2] eclipse安装Axis2插件和简单的webservice发布 [3] eclipse+webservice开发实例
|


【本文地址】